Get Ahead of Google's 2024 Email Rules
Protect Your Reputation on AWS
March 20, 2024
If you're into sending out bulk emails—newsletters, promotional blasts, that sort of thing—then you've probably heard that Google is changing the rules in 2024. Google will start requiring extra authentication to make sure your emails are actually coming from you. Most likely, we’ll see other email providers follow Google’s example in the coming months and years.
Don't worry—it's not as scary as it sounds. In fact, this is a great opportunity to beef up your email security and protect your sender reputation. I will walk you through setting everything up using AWS tools, making the whole process a breeze.
Why Bother with This?
Let's be honest, sometimes, tech changes feel like an unnecessary hassle. But this is one you want to get on top of. Here's why:
- Keep Spammers at Bay Ever get annoyed when an obvious spam email slips through into your inbox? These new tools will help filter the real you from the imposters.
- Customers Trust You When people see your emails are verified, they know they can trust what's inside.
- Deliverability Boost Have you ever wondered if your carefully crafted newsletters are reaching people's inboxes? Proper authentication is a big step towards inbox success.
Tools of the Trade: SPF, DKIM, and DMARC
Let's break down the acronyms you'll hear about:
- SPF (Sender Policy Framework) Like a bouncer at a party - it keeps track of which servers are allowed to send emails on behalf of your business.
- DKIM (DomainKeys Identified Mail) Provides a unique digital signature for each email you send.Think of it like a wax seal on an envelope, proving it hasn't been tampered with.
- DMARC (Domain-based Message Authentication, Reporting & Conformance) The boss of the operation – it tells email servers how to handle messages that don't pass SPF or DKIM checks.
Step One: Domain Migration (If Needed)
If you're not already hosting your domain's DNS with Amazon Route 53, this is the perfect time to make the switch. Especially if your domain registrar is currently Google Domains before they switch you to Squarespace. Route 53 is reliable and integrates seamlessly with other AWS services like CloudFront and Elastic Beanstalk. It makes it super easy to do all this fancy email authentication.
Step Two: Configuring SPF, DKIM, and DMARC in Route 53
Fire up Route 53 Head to the AWS Console, find Route 53 and select your hosted zone.
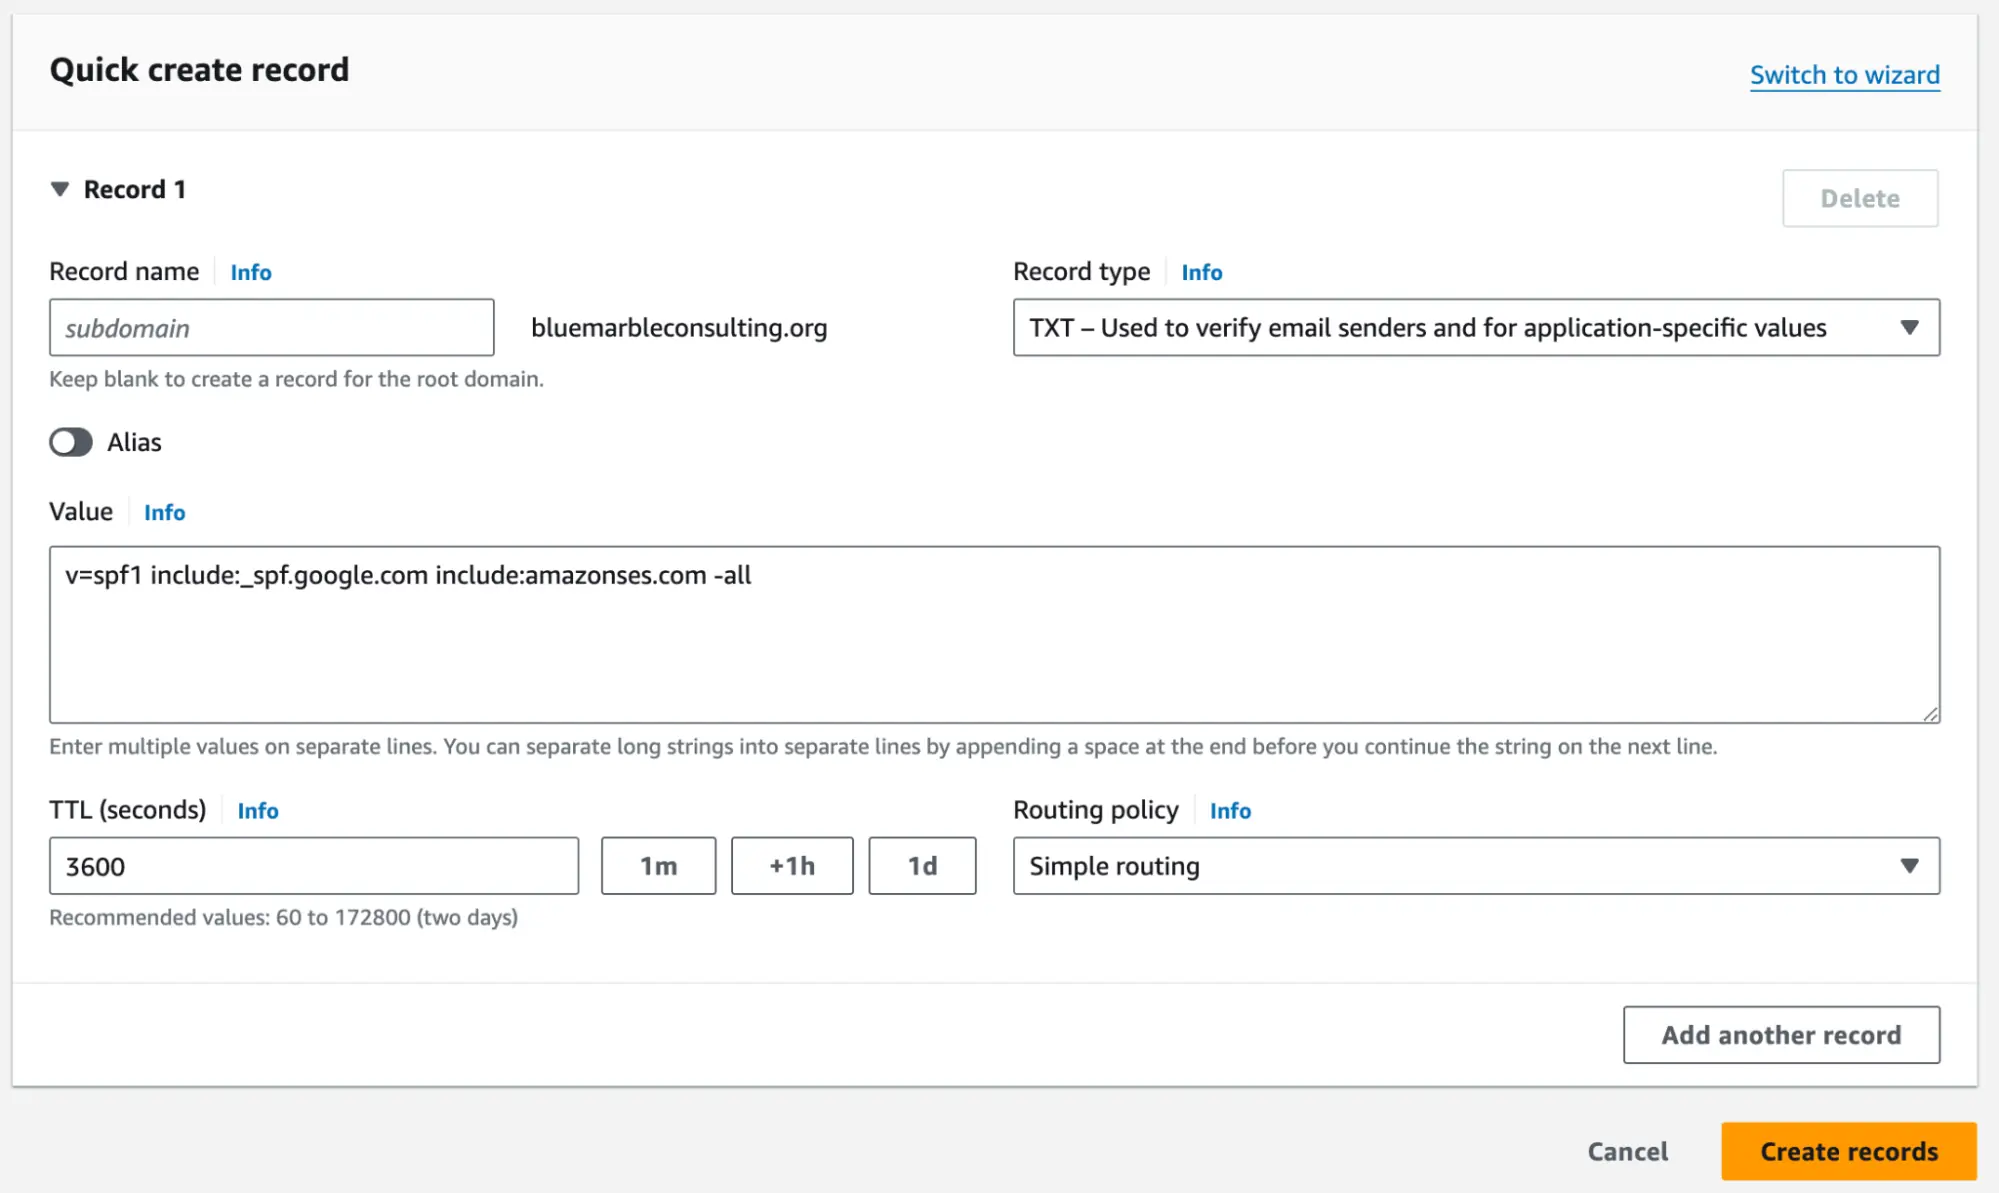
SPF Time Create a new TXT record and put your SPF rules in the value section. Your email provider will have the exact rules you need. If you have multiple TXT values to provide for your domain, just put each on a separate line.
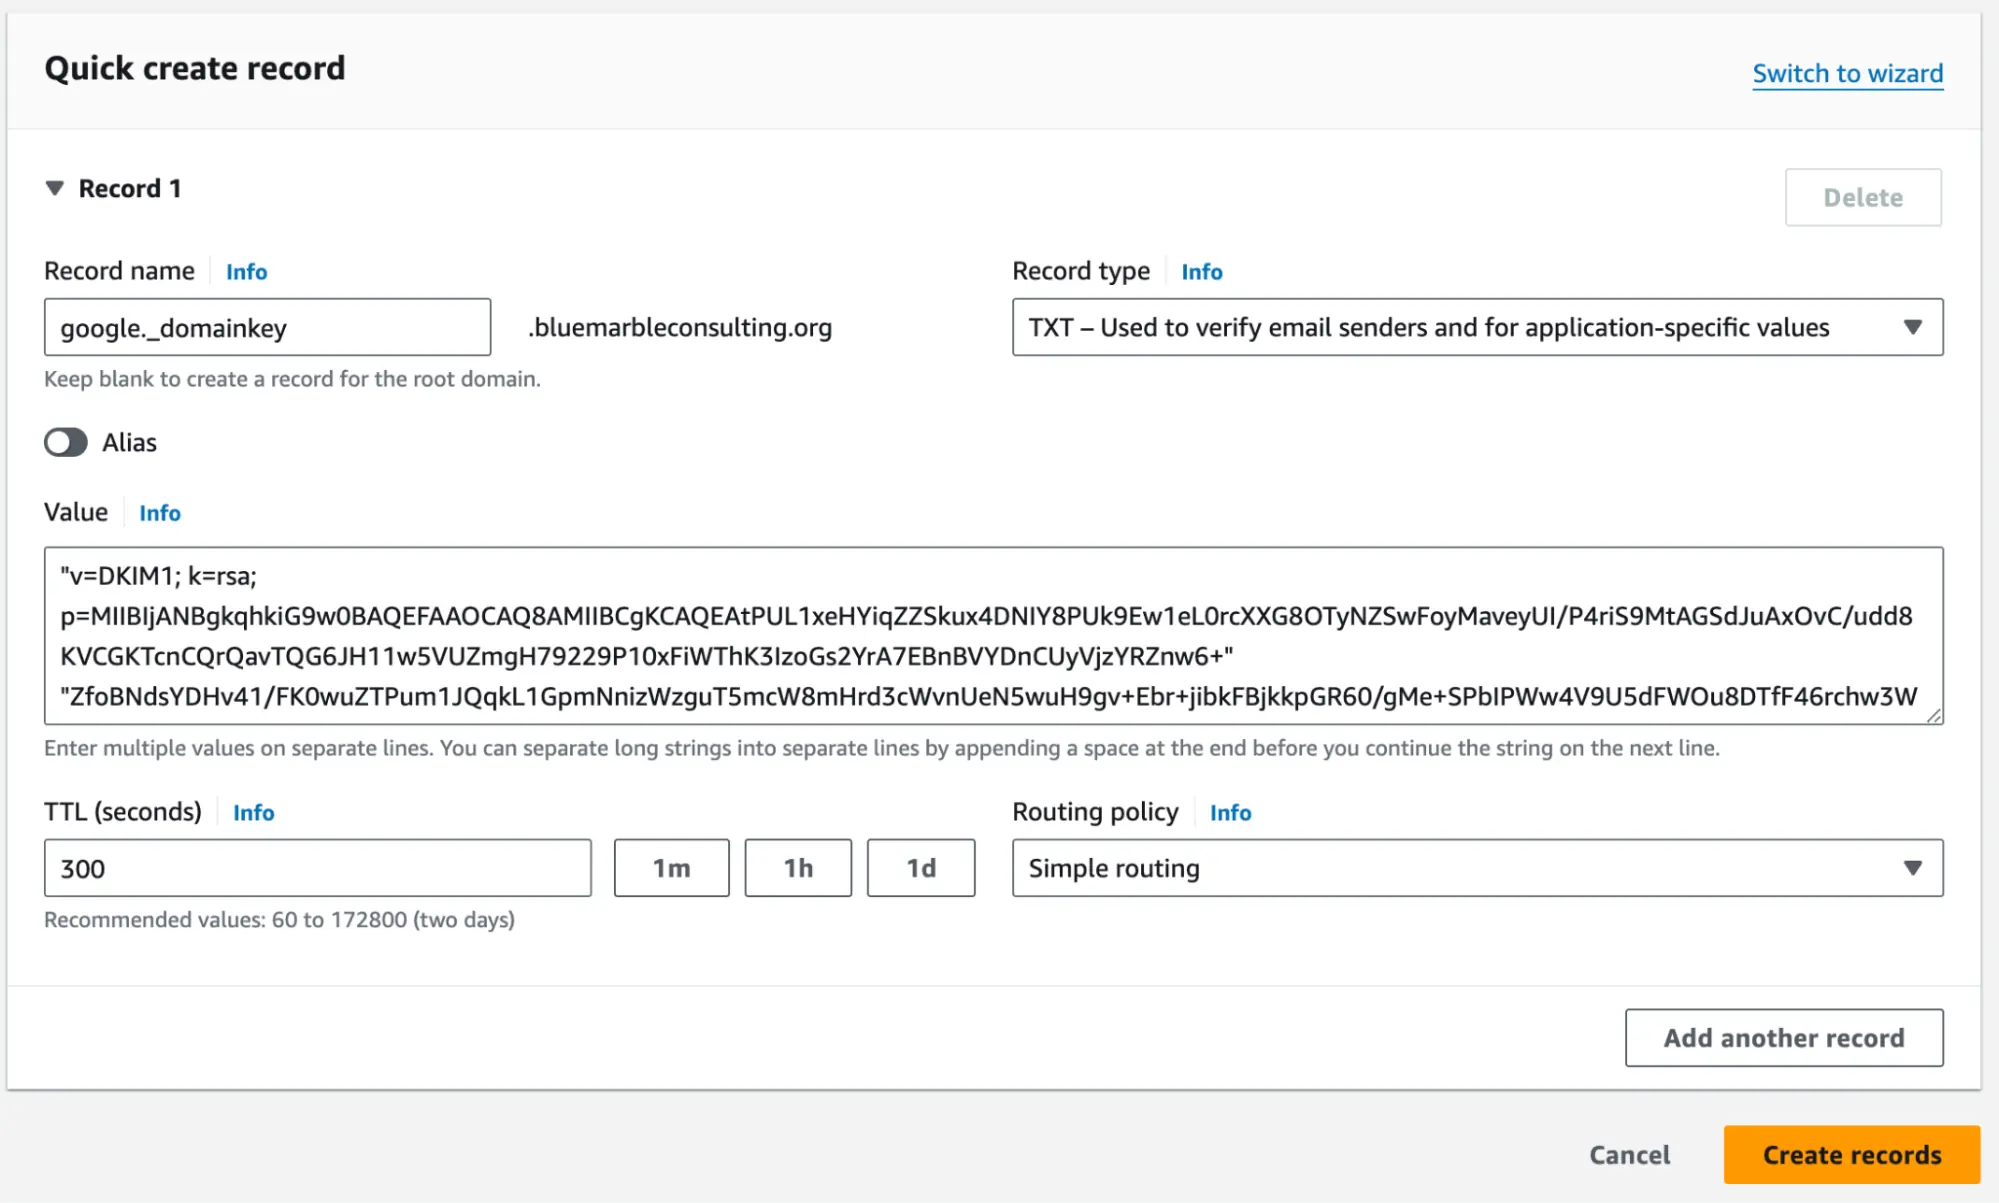
DKIM Setup Your email provider will give you some magic DKIM keys to add. In Route 53, create CNAME records and pop those keys in.
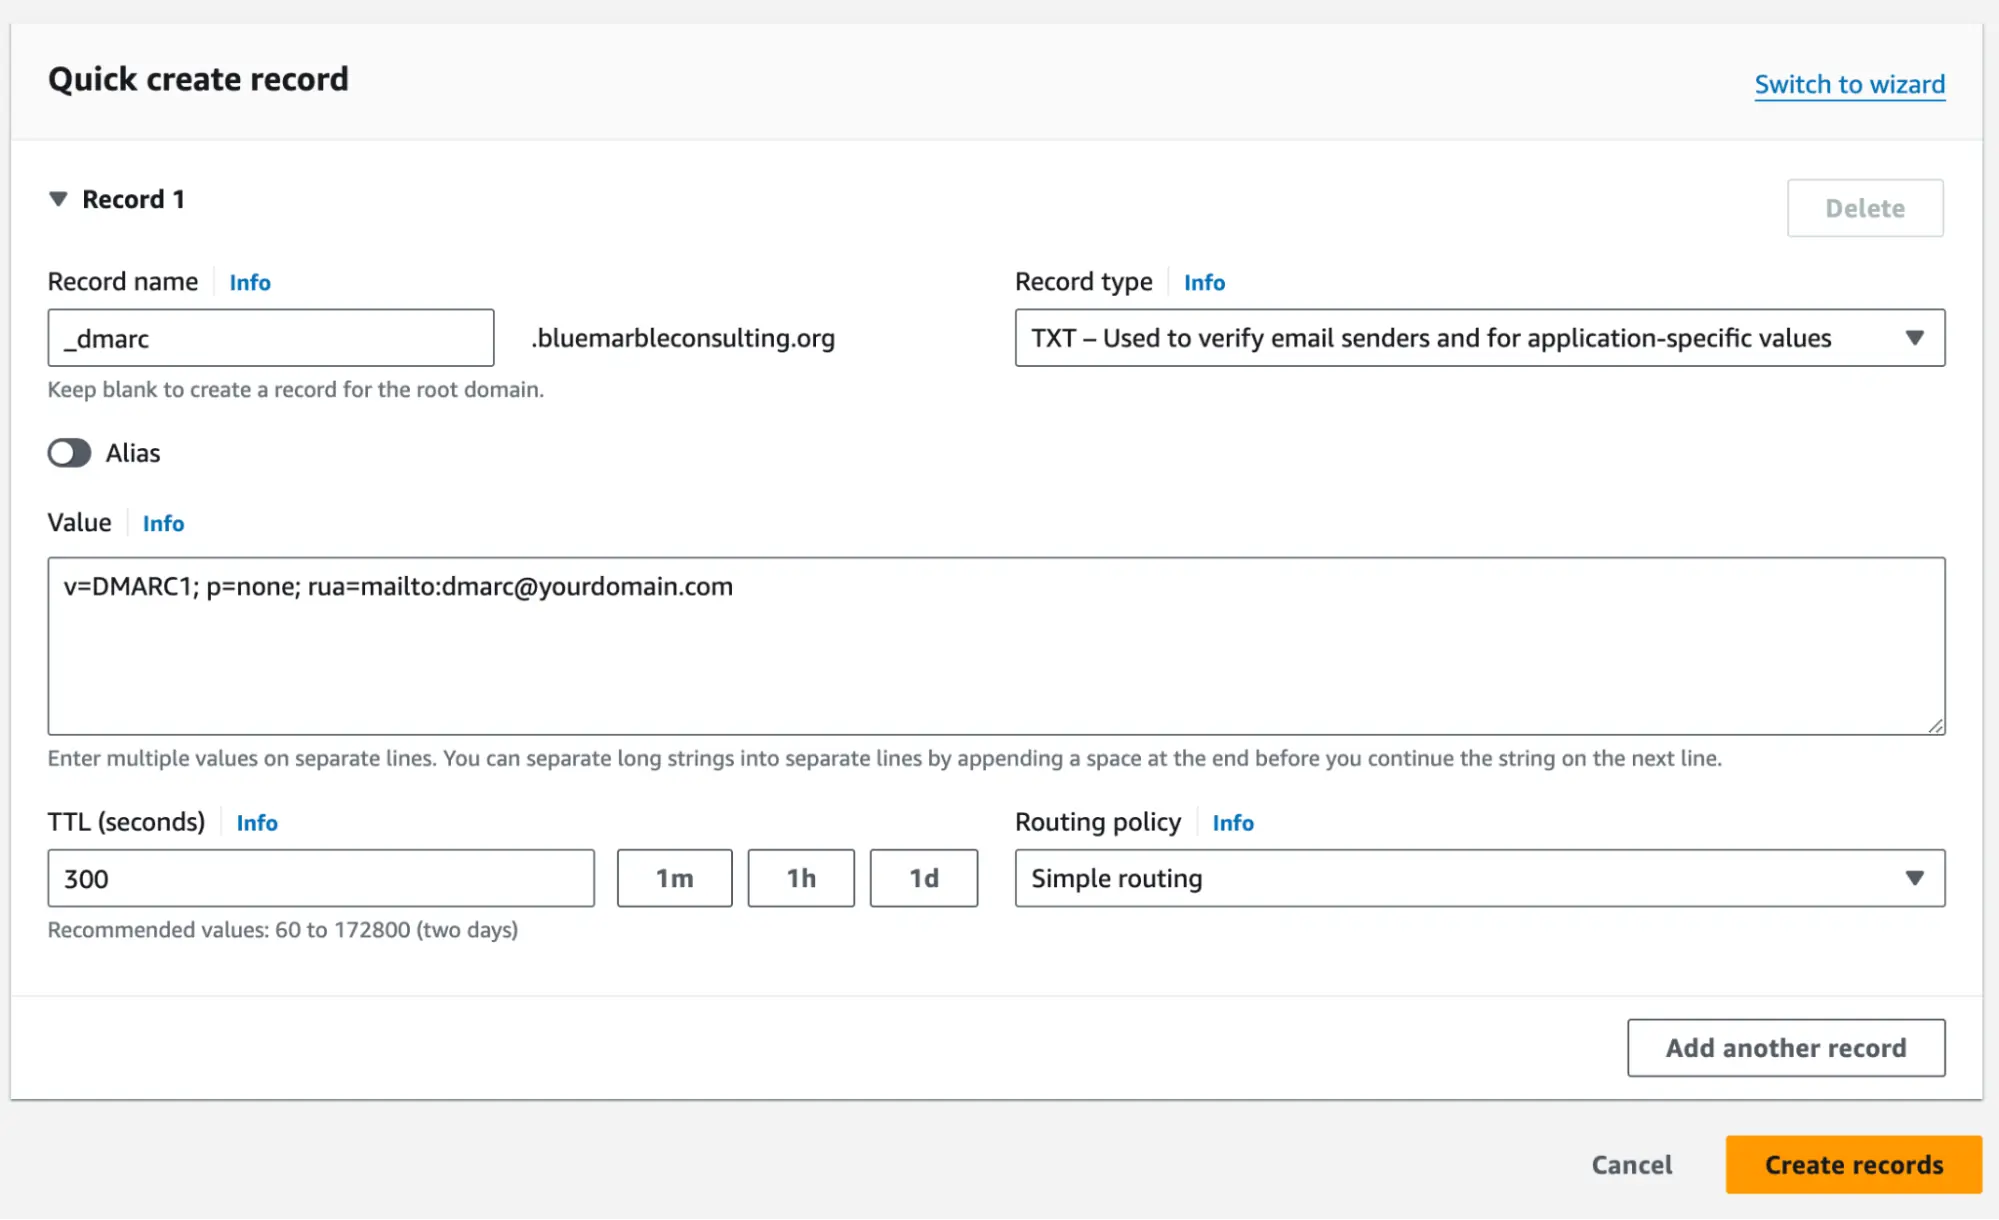
DMARC Policy Add a final TXT record starting with "_dmarc". This is where you tell email servers if they should quarantine or straight-up reject unverified emails.
Bonus Round: DNSSEC 🔐
Want to go the extra mile for security? DNSSEC adds another layer of protection by digitally signing your DNS records. It's like adding a tamper-proof seal to your whole DNS setup. AWS makes this easier than you'd expect. In your hosted zone in Route 53, click the DNSSEC Signing tab and follow the instructions to add your signing key to your domain.
Feeling Secure Yet?
These steps might sound a little technical, but trust me, it's well worth the effort! Setting up these records makes your email way more trustworthy, ultimately boosting your business. Plus, since you're doing it in AWS, it's extra convenient.
Google's new requirement might seem daunting, but it's a great opportunity to boost your email security and deliverability. Using AWS Route 53 simplifies the process. Consider it a worthwhile investment in your brand's trustworthiness! If you'd like some help configuring your email security settings in Route 53, don't hesitate to reach out to Blue Marble Consulting at aws@bluemarbleconsulting.org. As an AWS expert, we can help ensure your emails land in the right inboxes.